Setting up a C/C++ Learning Environment for Windows
Table of Contents
Times have changed a lot since the Turbo days. And although schools and colleges are still stuck in their archaic practices, let’s see how you can run your C/C++ programs using modern tools.
What’s needed?⌗
- A Compiler
- A Code-Editor (preferably an IDE for better QOL)
What to use?⌗
The only absolute truth is (that development environments) change.
As the needs and goals of a project change, tools change, the best-fits for the job change.
For this particular setup geared towards beginners, we’ll be using the GNU toolchain — i.e. the gcc compiler and the de facto of today’s times, VS Code, as the code-editor.
Now the GNU toolchain isn’t native to the Windows world. To use it on Windows, we ned to use something called MinGW-w64 runtime. Let’s go ahead and grab it.
Setting up the Compiler⌗
- Download the latest
MinGW-w64build from here.- We need the file for a 64-bit machine, with the latest C runtime. So the filename should include keywords like
win32,x86_64, anducrt. Here’s what the filename looks like at the time of writing: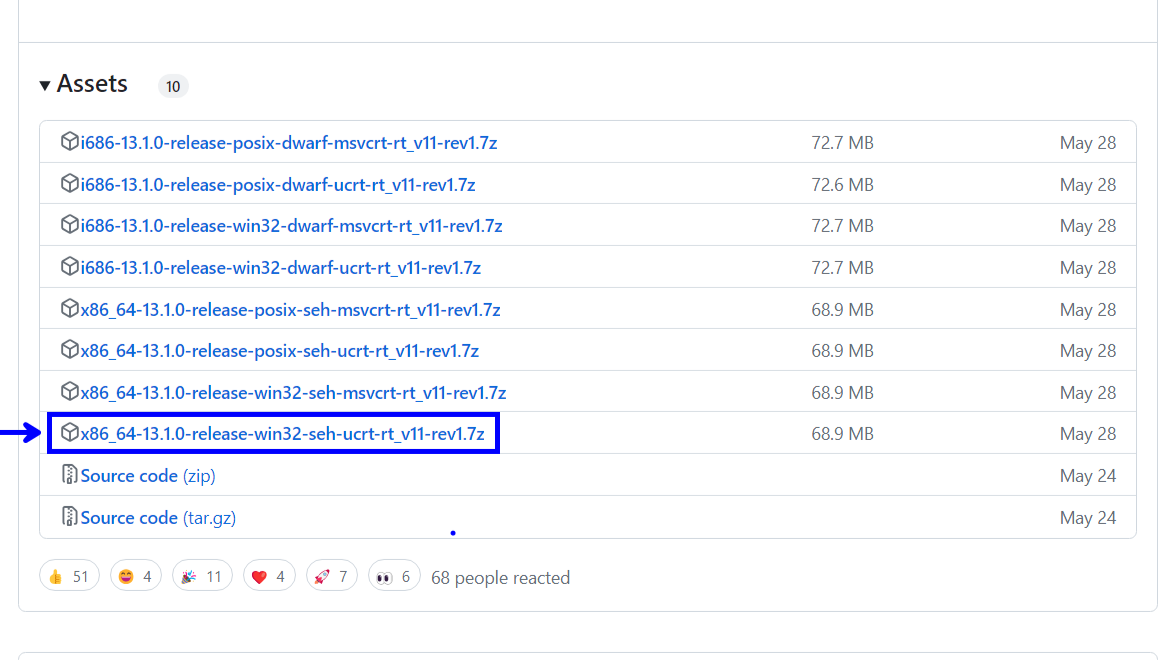
File to download
- We need the file for a 64-bit machine, with the latest C runtime. So the filename should include keywords like
- Once the download completes, extract the zip file and move the
mingw64folder to your desired location. This is what holds your compiler.- A path not too complex should be preferred.
- For the article’s sake, let’s just move the folder to the root of the
C:drive.
- Add this new location to the
PATHto make the compiler accessible anywhere through the command line.- You can follow along the steps mentioned in this blog post.
- Launch terminal and type-in
gcc --version. If done correctly, it should not error out but instead give output similar to this: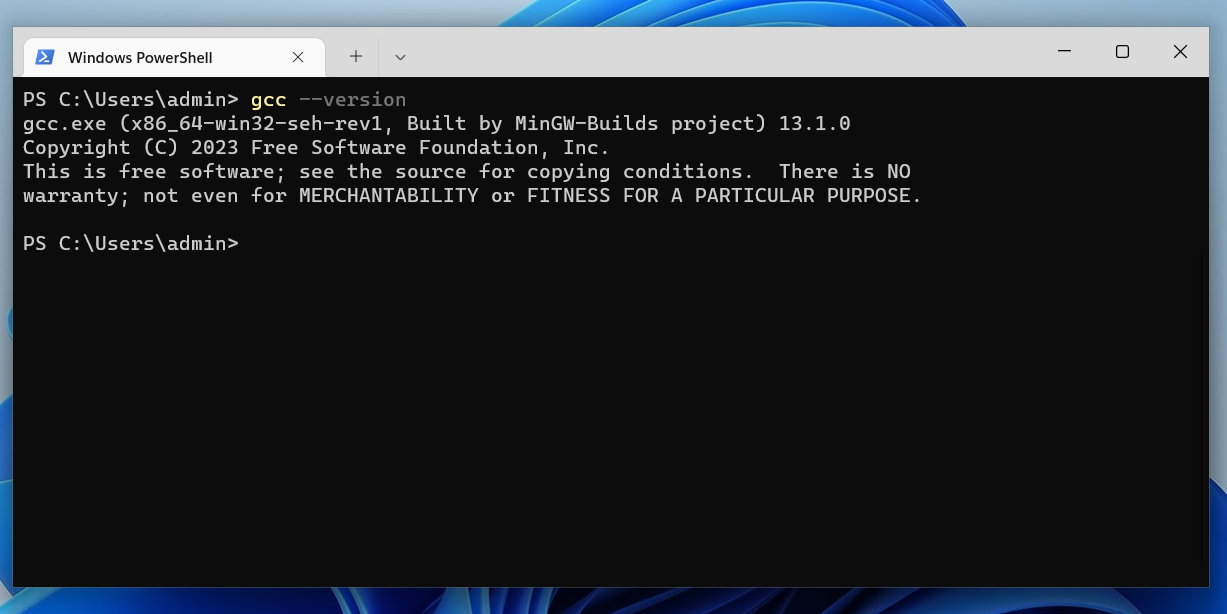
Congratulations! You just setup a compiler on your Windows machine and you can start compiling right away.
Let’s now see how to setup VS Code to go along with this.
Setting up VS Code⌗
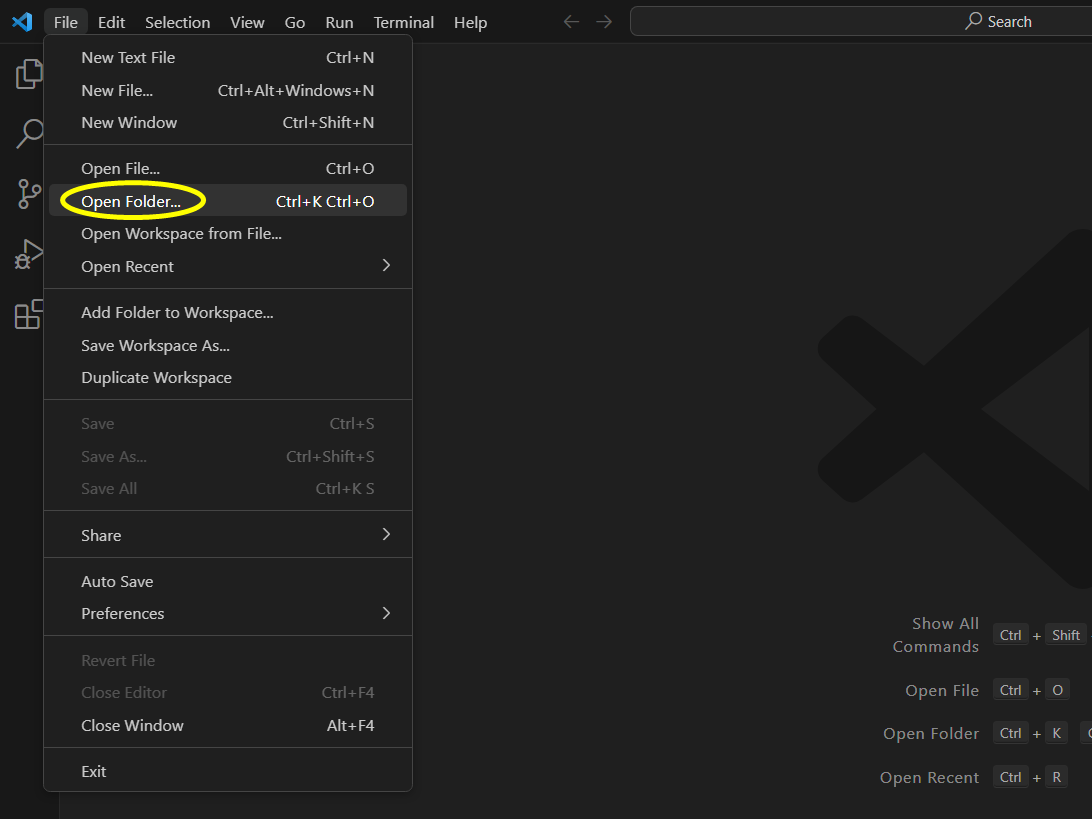
- Launch VS Code and open the folder where you’ll store and run the code from in the workspace.
- You can use an empty folder for this.
- You can use an empty folder for this.
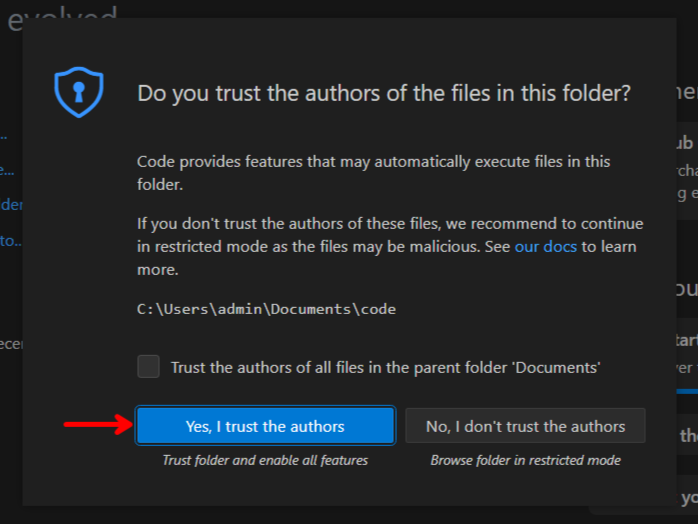
- Confirm the Trust Dialog since it is only you who’ll be coding there.
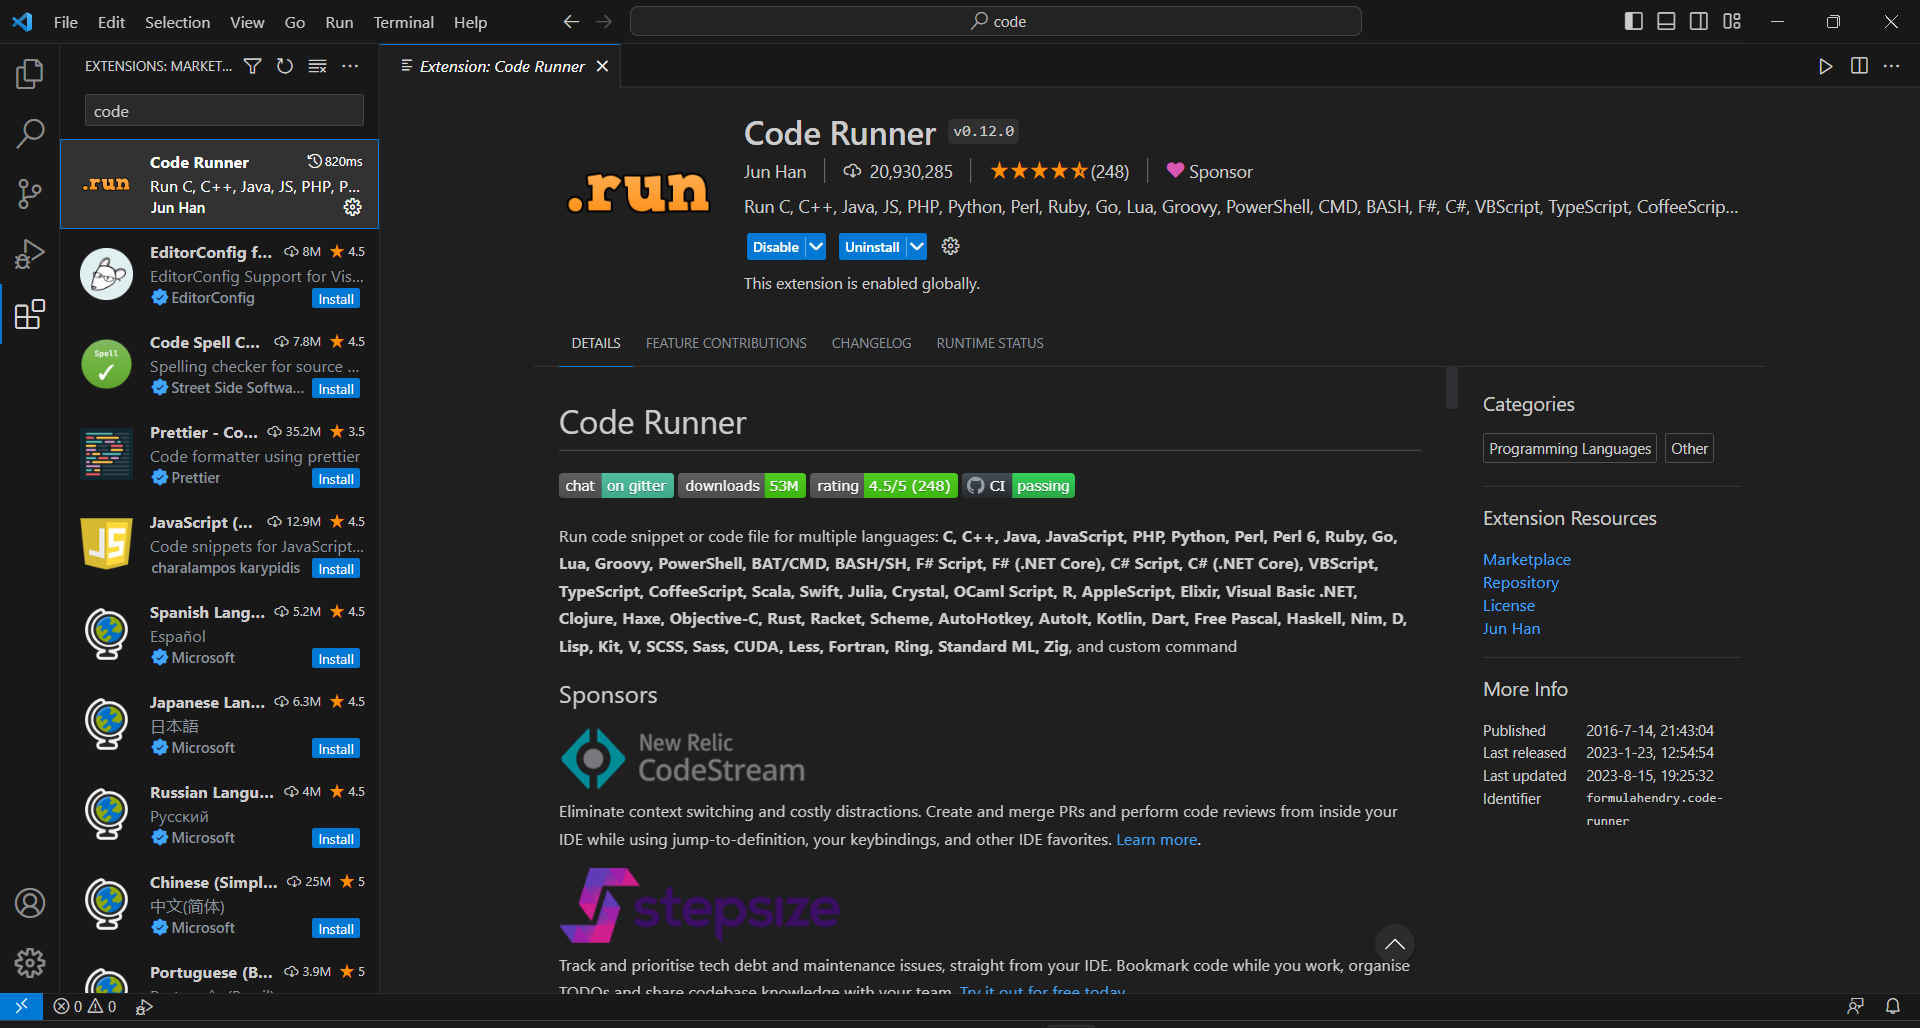
- Since VS Code is not a complete IDE, you need extensions to get language-specific features. Here’s what’s needed for our setup: C/C++ Extension Pack and Code Runner.

- Once the extensions are installed, we need to do some project specific setup. Launch Command Pallete by hitting
Ctrl+Shift+Pand search for “C/C++: Edit Configurations (UI)”.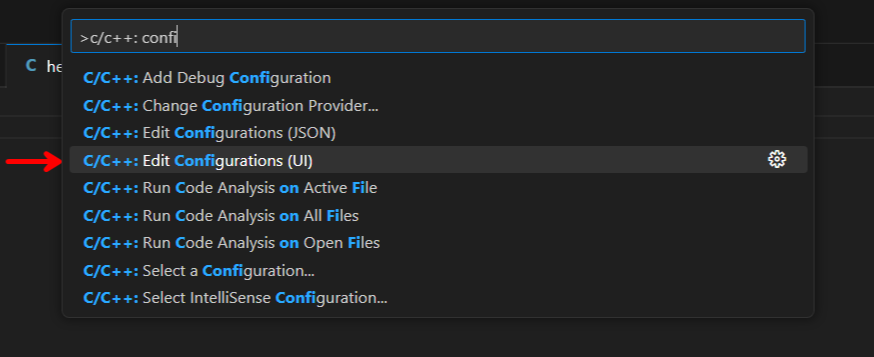
- In the window that opens, check if your compiler is properly detected and select
gccif it’s not the selected one.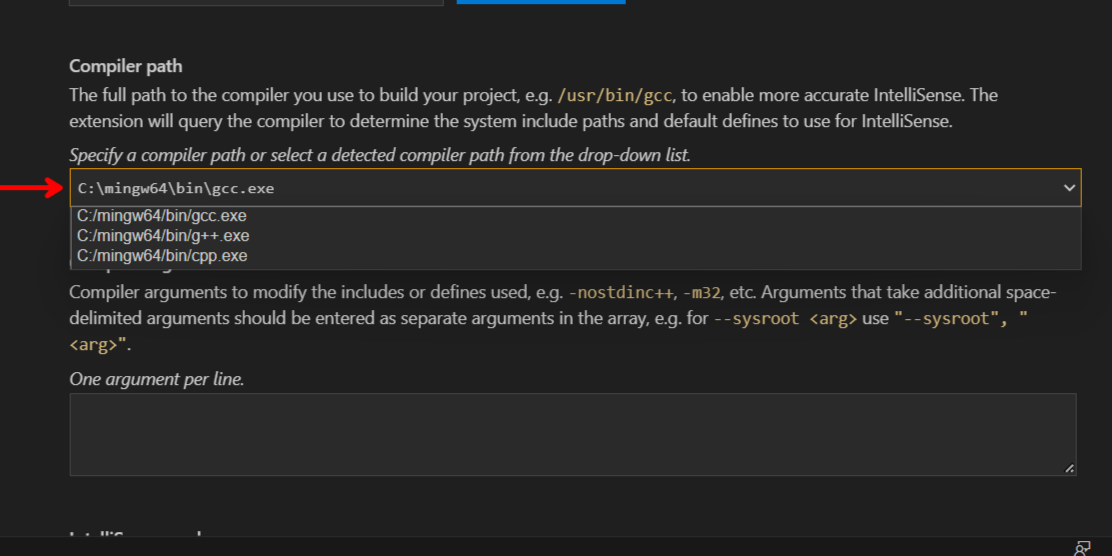
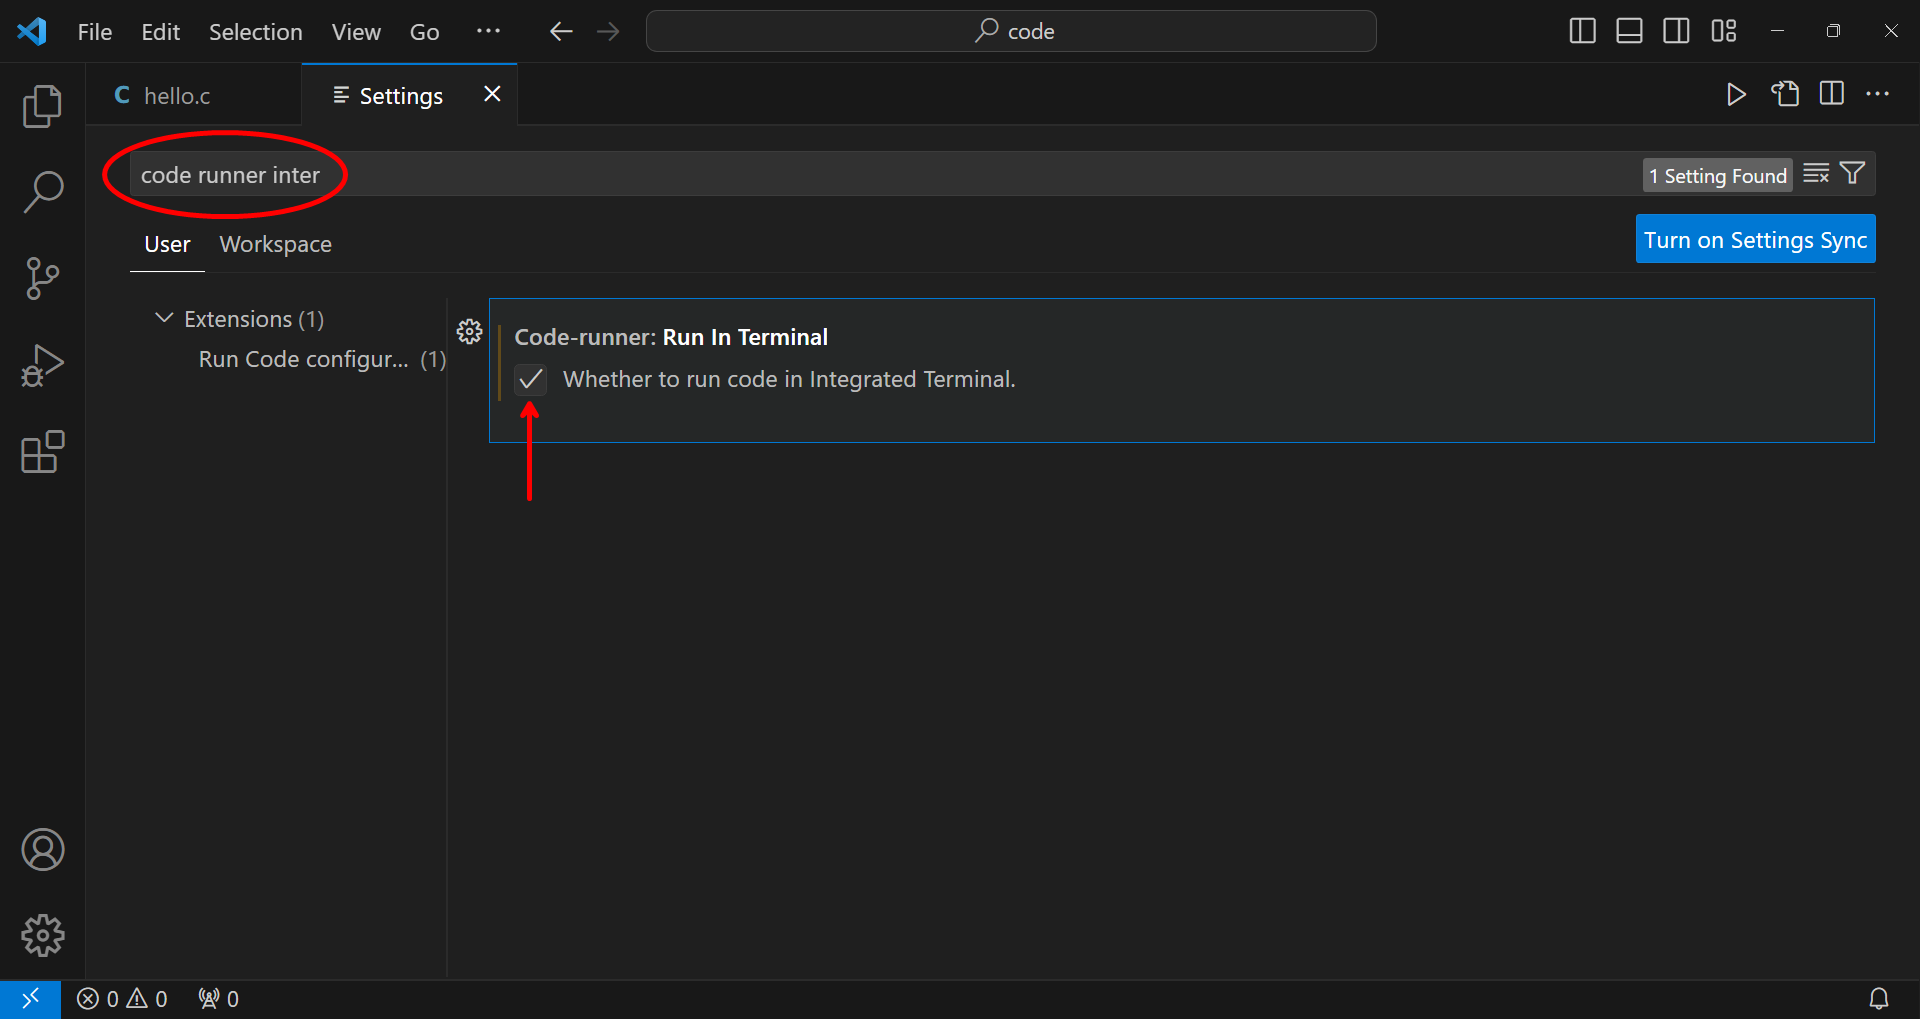
- Launch Command Pallete again. This time search for “Preferences: Open User Settings”.
- In the opened page, search for “code runner integrated” and tick the box that appears. This will ensure you can also receive input from the user.
- And that’s about it. You can now run the code.
- Open the dropdown besides the run icon in the top-right.
- Select the “Run Code” option with a keyboard shortcut attached to it. This will make it the default action when you press the run button.
- A new terminal will pop up and the compiled executable will be run.
Happy Hacking ;)